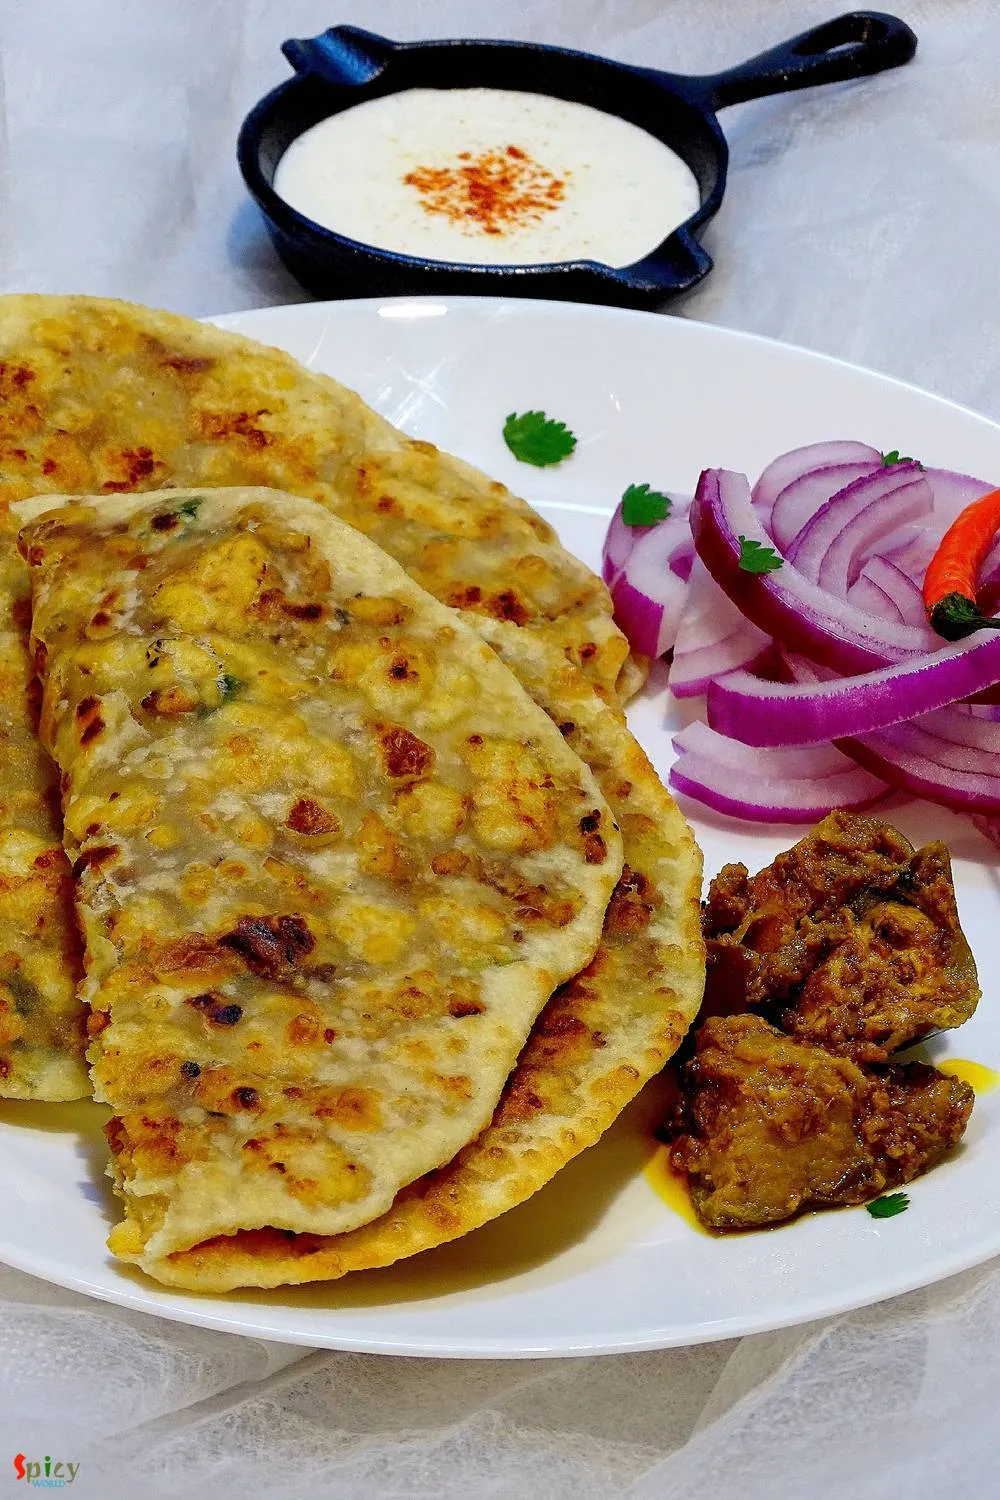
Imagine biting into a crispy, golden-brown paratha that's bursting with juicy, spiced chicken filling – a culinary journey that transports you straight to the vibrant streets of India. This Chicken Keema Paratha isn't just a recipe; it's a delicious adventure waiting to unfold in your very own kitchen. Whether you're a seasoned cook or a curious food enthusiast, this mouthwatering dish promises to transform an ordinary meal into an extraordinary experience that will have everyone asking for seconds!
Prep Time: 15 mins
Cook Time: 30 mins
Total Time: 45 mins
Cuisine: Indian
Serves: 4 servings
Ingredients
- 250g minced chicken
- 2 cups whole wheat flour
- 1 onion, finely chopped
- 1 teaspoon cumin seeds
- 1 teaspoon garam masala
- 2 tablespoons yogurt
- Salt to taste
- Water as needed
Instructions
- In a large mixing bowl, combine 2 cups of whole wheat flour and a pinch of salt. Gradually add water, kneading the flour until it forms a smooth and pliable dough. Cover the dough with a damp cloth and let it rest for about 15 minutes.
- While the dough is resting, heat a tablespoon of oil in a pan over medium heat. Add 1 teaspoon of cumin seeds and let them sizzle for a few seconds until fragrant.
- Add the finely chopped onion to the pan and sauté until it turns golden brown. This should take about 5-7 minutes.
- Once the onions are browned, add the minced chicken to the pan. Cook the chicken, breaking it apart with a spatula, until it is no longer pink, about 5-7 minutes.
- Stir in 1 teaspoon of garam masala and 2 tablespoons of yogurt. Mix well to combine all the ingredients. Season with salt to taste. Cook for an additional 5-7 minutes, allowing the flavors to meld together. Remove from heat and let the filling cool slightly.
- After the dough has rested, divide it into equal portions, about the size of a golf ball. Roll each portion into a smooth ball.
- Take one ball of dough and flatten it slightly. Dust it with a little flour and roll it out into a small circle, about 4-5 inches in diameter.
- Place a generous tablespoon of the chicken filling in the center of the rolled-out dough circle. Carefully fold the edges over the filling to enclose it completely, pinching to seal.
- Gently flatten the stuffed dough ball with your palm, then roll it out again carefully into a larger circle, about 6-7 inches in diameter. Be gentle to avoid the filling from spilling out.
- Heat a tawa or skillet over medium heat. Once hot, place the rolled paratha on the tawa. Cook for about 2-3 minutes on one side until golden brown, then flip it over.
- Brush a little oil or ghee on the cooked side and let it cook for another 2-3 minutes on the other side until it is golden and crisp. Repeat the process for the remaining dough and filling.
- Serve the hot Chicken Keema Parathas with yogurt or a side of chutney for dipping. Enjoy your homemade dish!
Tips
- Dough Consistency is Key: Ensure your wheat flour dough is smooth and elastic. The resting period helps develop gluten, making the parathas more pliable.
- Filling Temperature Matters: Let the chicken filling cool slightly before stuffing to prevent tearing the dough.
- Rolling Technique: Use gentle pressure when rolling stuffed parathas to prevent the filling from breaking through.
- Heat Control: Maintain medium heat while cooking to achieve a crispy exterior without burning.
- Extra Flavor Boost: Add finely chopped green chilies or fresh coriander to the chicken filling for an extra kick.
- Serving Suggestion: Serve immediately with cool yogurt, tangy pickle, or fresh mint chutney for the ultimate flavor experience.Pro Tip: Practice makes perfect! Don't get discouraged if your first few parathas aren't picture-perfect – the taste will still be amazing!
Nutrition Facts
Calories: 291kcal
Carbohydrates: g
Protein: g
Fat: g
Saturated Fat: g
Cholesterol: mg