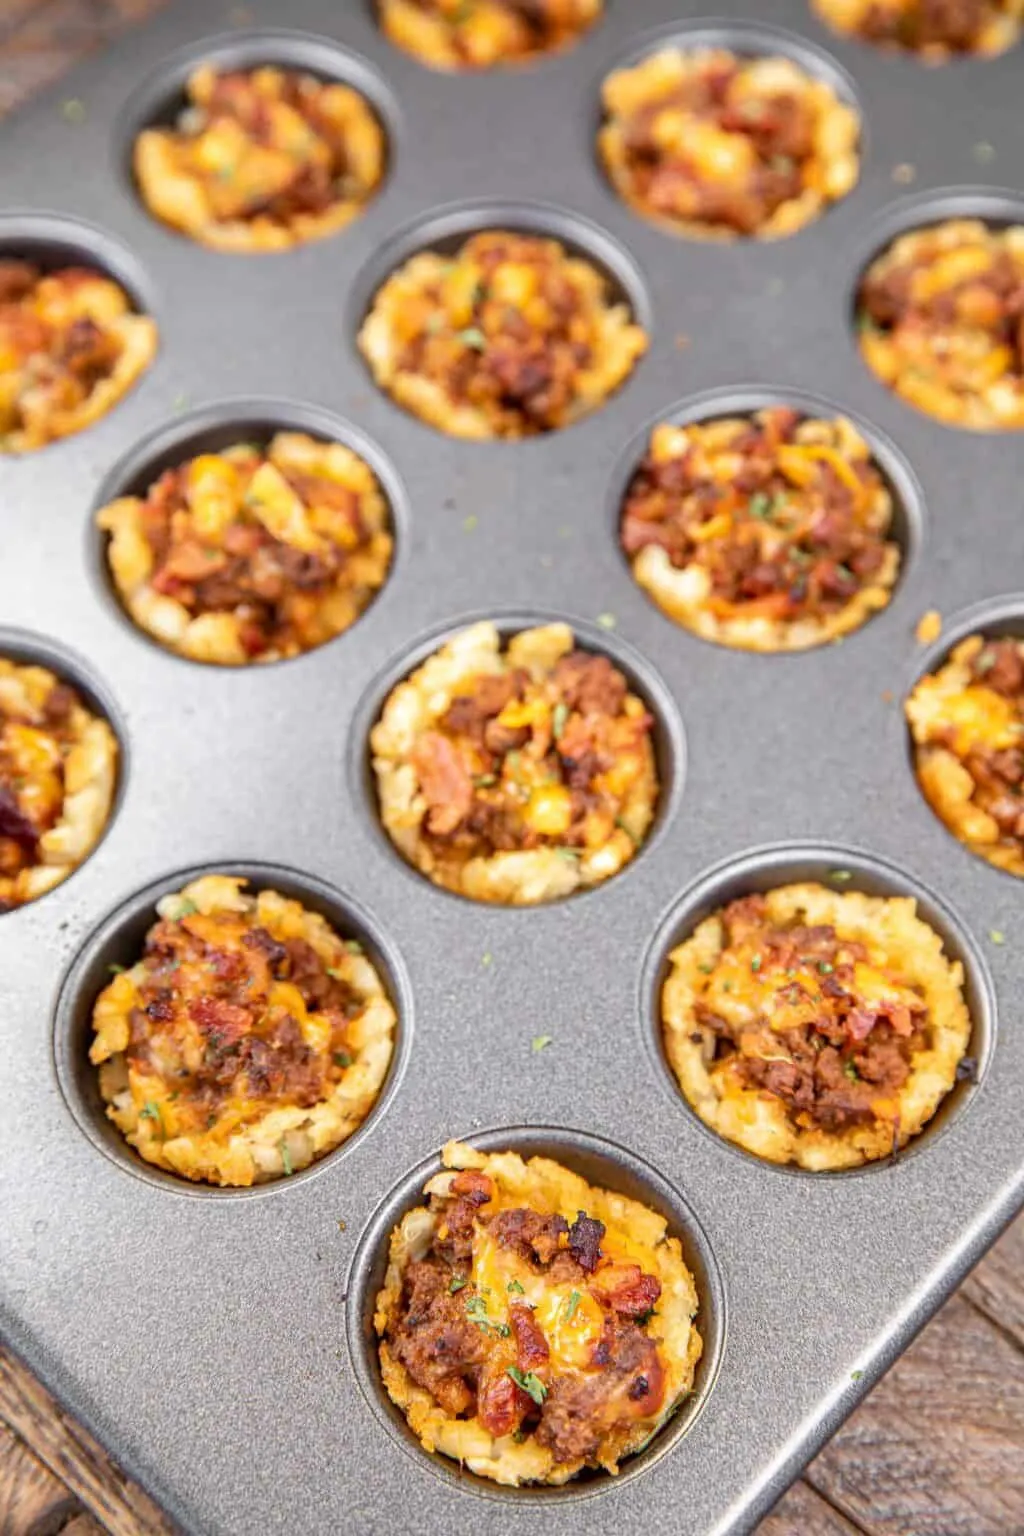
Get ready to revolutionize your appetizer game with these irresistible Mini Cheeseburger Tater Tot Cups - a mouthwatering fusion of crispy tater tots, juicy ground beef, and melted cheese that will have your guests begging for more! Imagine the perfect bite-sized comfort food that combines the classic cheeseburger flavors with the crispy crunch of tater tots, all packed into one incredibly addictive little package. Whether you're hosting a game day party, looking for a crowd-pleasing snack, or just want to impress your family with a creative twist on traditional burgers, these mini cups are about to become your new culinary superstar!
Prep Time: 20 mins
Cook Time: 30 mins
Total Time: 50 mins
Cuisine: American
Serves: 6 servings
Ingredients
- 1 bag frozen tater tots
- 1 pound ground beef
- 1/2 cup diced onion
- 1 cup shredded cheddar cheese
- 1/4 cup ketchup
- 1/4 cup mustard
- Salt and pepper to taste
Instructions
- Preheat the oven to 425°F (218°C). Spray a 12-cup muffin tin thoroughly with non-stick cooking spray to ensure easy removal of the tater tot cups.
- Take the frozen tater tots and arrange them in the muffin cups, pressing them down gently to create a cup-like shape at the bottom and sides of each cup. Ensure the tots are packed tightly to form a solid base.
- Place the prepared muffin tin with tater tots in the preheated oven and bake for 10-12 minutes until the tots start to become golden and crispy.
- While the tater tots are pre-baking, heat a large skillet over medium-high heat. Add the ground beef and diced onions, breaking the meat into small crumbles as it cooks.
- Season the beef mixture with salt and pepper. Cook until the meat is completely browned and the onions are translucent, approximately 6-8 minutes.
- Drain any excess fat from the beef mixture to prevent the cups from becoming too greasy.
- Remove the partially baked tater tot cups from the oven. Carefully spoon the cooked beef and onion mixture into each cup, filling them about 3/4 full.
- Sprinkle shredded cheddar cheese generously over the beef in each cup.
- Return the muffin tin to the oven and bake for an additional 10-12 minutes, or until the cheese is fully melted and the edges of the tater tots are deep golden brown and crispy.
- Remove from the oven and let the cups cool in the tin for 3-5 minutes to help them set and make removal easier.
- Carefully remove the tater tot cups using a small offset spatula or butter knife. Place on a serving platter.
- Drizzle ketchup and mustard over the tops of the cups, or serve the sauces on the side for individual dipping.
- Serve immediately while hot and crispy, garnishing with additional chopped herbs or green onions if desired.
Tips
- Non-Stick is Your Best Friend: Make sure to generously spray your muffin tin with non-stick cooking spray to ensure easy removal of the cups.
- Crispy Tots are Key: Press the frozen tater tots firmly into the muffin cups to create a solid base that will hold your delicious filling.
- Drain the Beef: Always drain excess fat from your ground beef to prevent greasy cups and maintain a perfect texture.
- Cheese Matters: Use freshly shredded cheddar cheese for the best melting and flavor. Pre-shredded cheese often contains anti-caking agents that can affect melting.
- Don't Overcrowd: Fill the tater tot cups about 3/4 full to allow room for cheese and prevent overflow.
- Let Them Rest: Allow the cups to cool in the tin for a few minutes after baking to help them set and make removal easier.
- Serve Immediately: These are best enjoyed hot and crispy, so time your preparation to serve right out of the oven.
- Customize Your Flavors: Experiment with different cheese types or add bacon bits for extra flavor variations.
Nutrition Facts
Calories: 380kcal
Carbohydrates: 25g
Protein: 22g
Fat: 23g
Saturated Fat: 9g
Cholesterol: 75mg