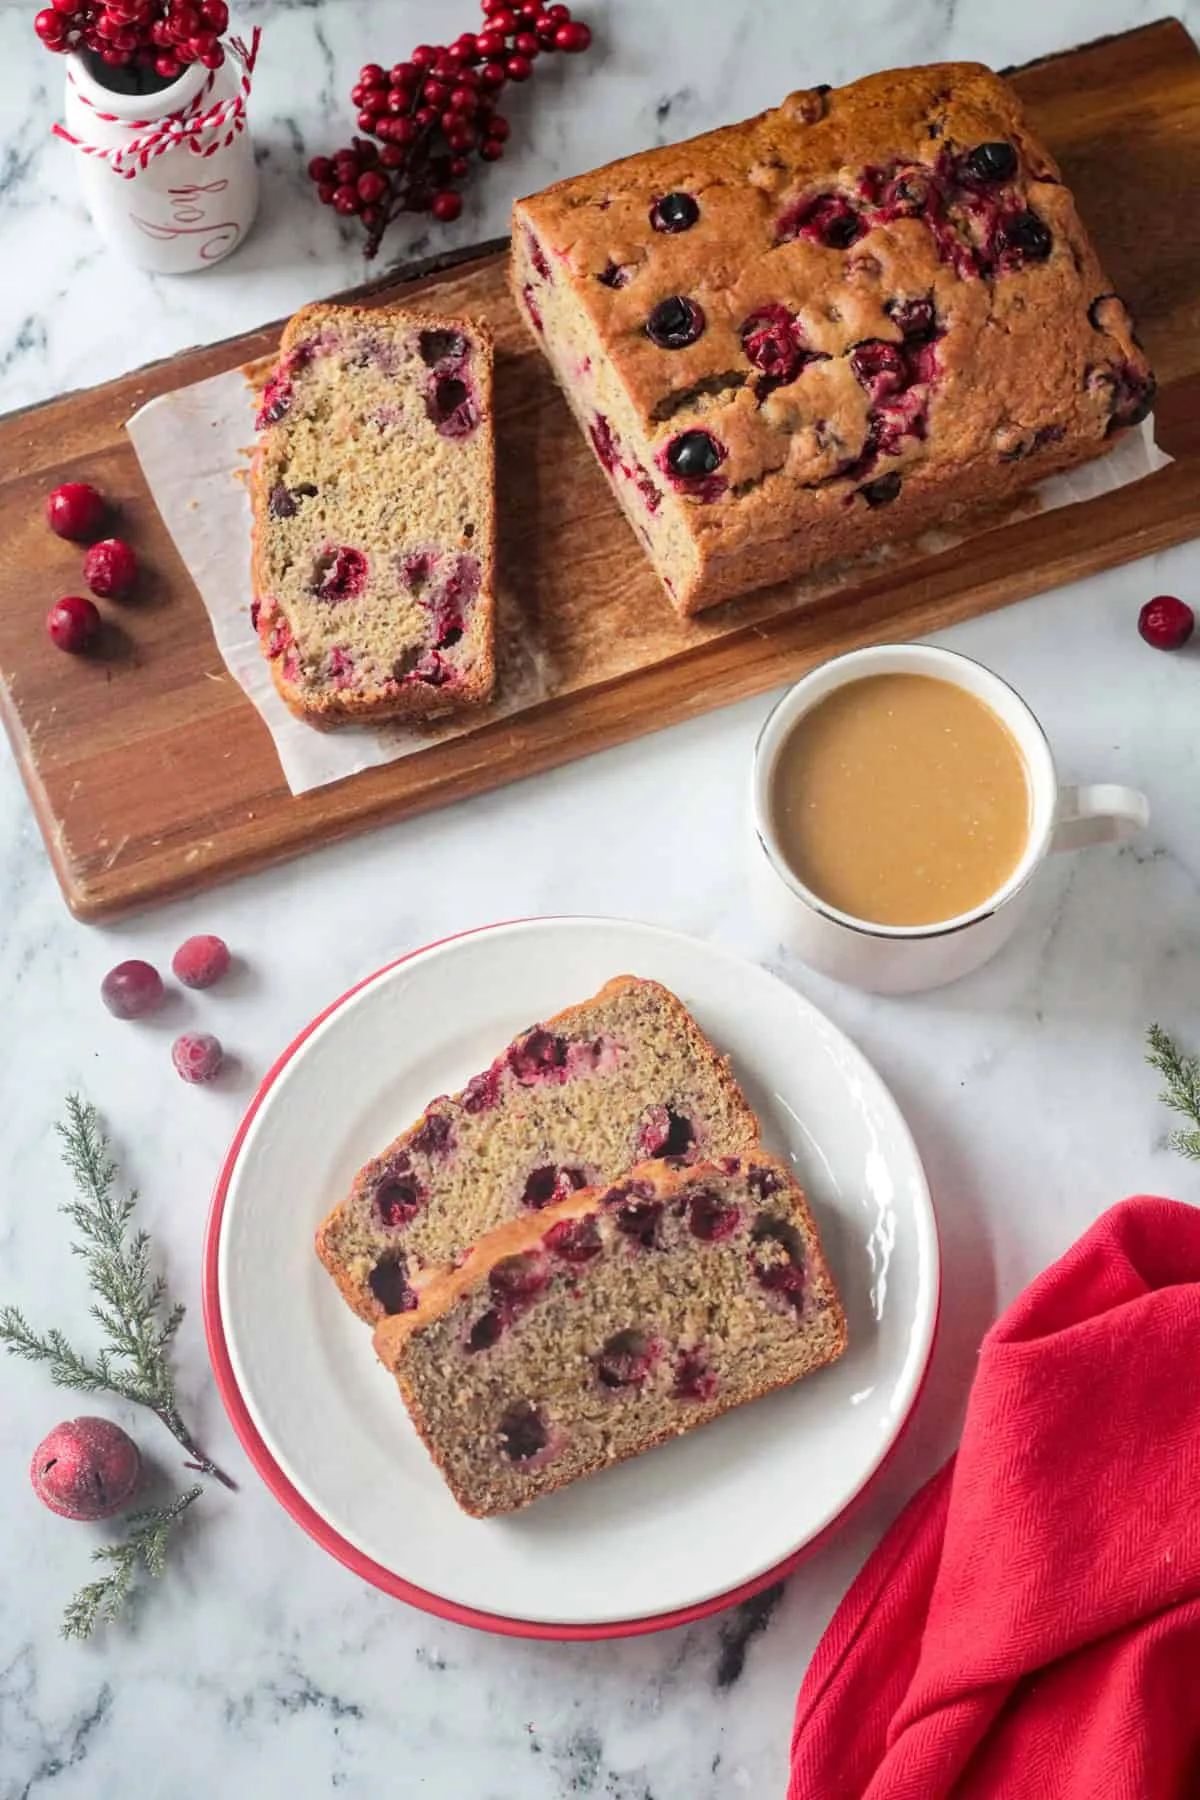
Are you ready to indulge in a delightful and wholesome treat that will make your taste buds dance? This Vegan Banana Cranberry Bread is not just a recipe; it's a symphony of flavors that combines the natural sweetness of ripe bananas with the tartness of dried cranberries. Perfect for breakfast, a snack, or even a dessert, this easy-to-make loaf is gluten-free and packed with nutrients, making it a guilt-free indulgence. With just a few simple ingredients and minimal prep time, you'll be on your way to creating a mouthwatering masterpiece that will have everyone asking for seconds. Don’t miss out on the chance to elevate your baking game—read on for the full recipe!
Ingredients
- 3 ripe bananas, mashed
- 1/2 cup maple syrup
- 1/4 cup almond milk
- 1 teaspoon vanilla extract
- 1 1/2 cups gluten-free flour blend
- 1 teaspoon baking soda
- 1/2 teaspoon salt
- 1/2 cup dried cranberries
Instructions
- Preheat your oven to 350°F (175°C). This ensures that the oven is at the right temperature when you are ready to bake the banana cranberry bread.
- In a large mixing bowl, mash the 3 ripe bananas using a fork or a potato masher until smooth. Make sure there are no large chunks left, as this will help create a consistent texture in the bread.
- Add 1/2 cup of maple syrup to the mashed bananas. This will not only sweeten the bread but also add moisture. Stir well to combine.
- Pour in 1/4 cup of almond milk and 1 teaspoon of vanilla extract. Mix everything together until fully incorporated and smooth.
- In a separate bowl, combine 1 1/2 cups of gluten-free flour blend, 1 teaspoon of baking soda, and 1/2 teaspoon of salt. Whisk these dry ingredients together to ensure even distribution of the baking soda and salt.
- Gradually add the dry mixture to the wet ingredients, stirring gently with a spatula or wooden spoon. Be careful not to overmix; a few lumps are okay.
- Fold in 1/2 cup of dried cranberries into the batter, ensuring they are evenly distributed throughout the mixture.
- Prepare a loaf pan by greasing it lightly with a bit of oil or lining it with parchment paper for easy removal after baking.
- Pour the banana cranberry batter into the prepared loaf pan, smoothing the top with a spatula to ensure an even surface.
- Bake in the preheated oven for about 50 minutes, or until a toothpick inserted into the center comes out clean. Keep an eye on it towards the end of the baking time.
- Once baked, remove the loaf from the oven and let it cool in the pan for about 10 minutes. Then, transfer it to a wire rack to cool completely.
- Slice the banana cranberry bread once it has cooled, and enjoy it as a delicious vegan treat for breakfast or a snack!
Tips
- Choose Ripe Bananas: The riper your bananas, the sweeter your bread will be. Look for bananas with plenty of brown spots for maximum flavor.
- Don’t Overmix: When combining the wet and dry ingredients, mix just until combined. Overmixing can lead to a dense bread, so a few lumps are perfectly fine.
- Customize Your Add-ins: Feel free to experiment with other mix-ins like chopped nuts, chocolate chips, or seeds to give your bread a unique twist.
- Check for Doneness: Ovens can vary, so start checking your bread a few minutes before the 50-minute mark. Insert a toothpick in the center; it should come out clean when the bread is done.
- Cool Completely: Allow the bread to cool completely on a wire rack before slicing. This helps the texture set and makes for cleaner slices.
- Storage Tips: Keep your banana cranberry bread in an airtight container at room temperature for up to 3 days, or refrigerate for longer freshness. You can also freeze slices for a quick snack later on!
Nutrition Facts
Calories: 180kcal
Carbohydrates: 40g
Protein: 2g
Fat: g
Saturated Fat: 0g
Cholesterol: 0mg